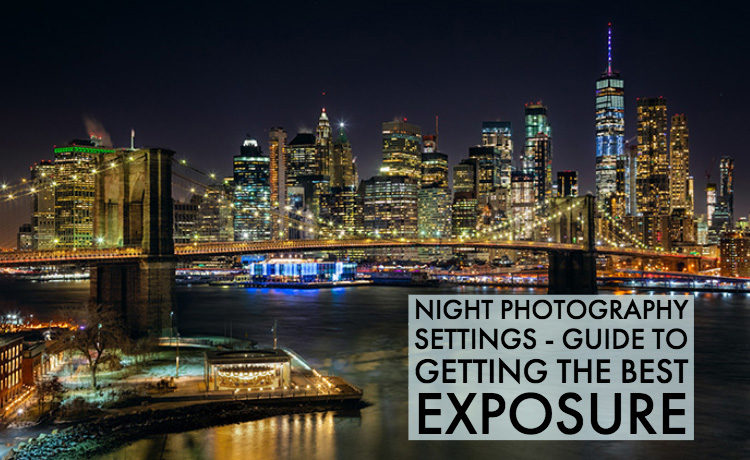
If you’ve ever wondered what the best night photography settings are — ISO, aperture, and shutter speed — or struggled with how to expose at night, this guide will give you everything you need. From city skylines to quiet streets, you’ll learn the essential steps for capturing sharp, vibrant photos after dark.
I often say that when I photograph at night, I feel like I’m cheating.
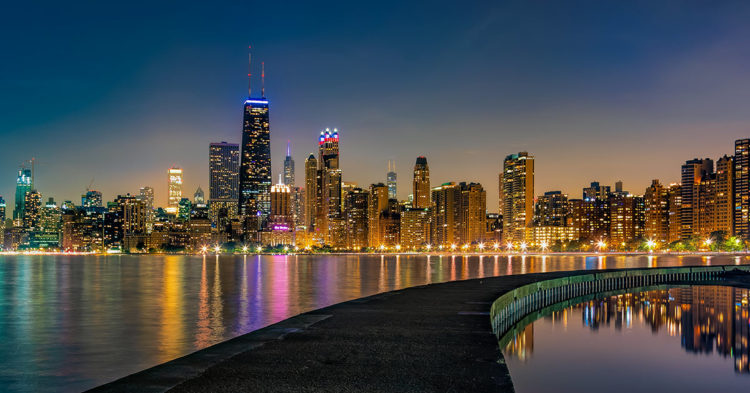
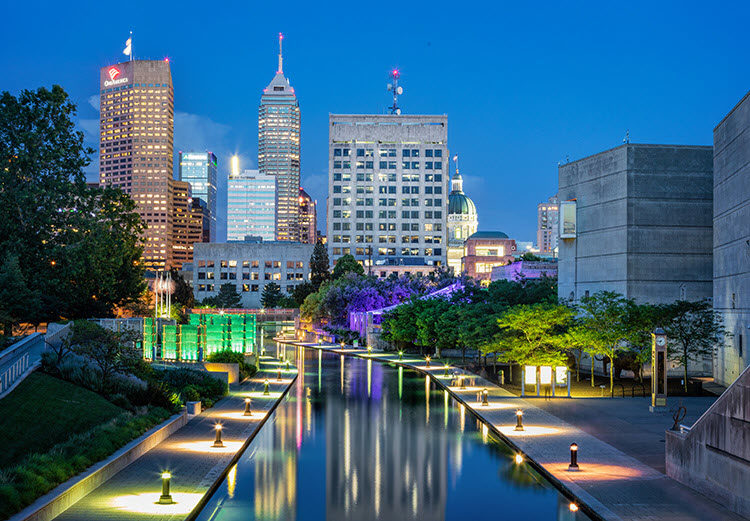
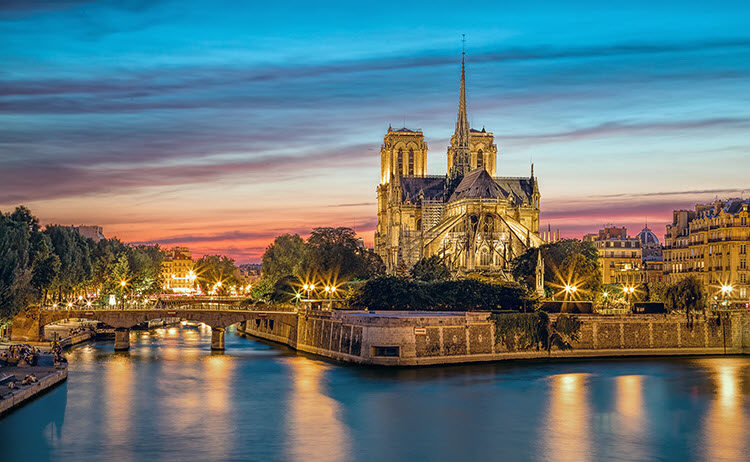
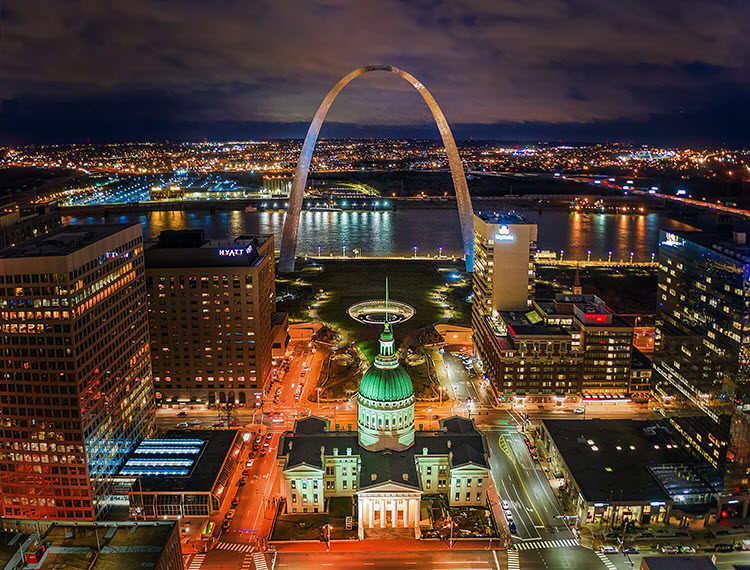
The bright lights and colors produce scenes that are almost always more dramatic than if I were out during the day. I don’t have to wait for golden hour.
Cities spend millions lighting up bridges, buildings, and landmarks for me to photograph. It almost feels unfair.
But photographing at night isn’t without its challenges. Tripods are non-negotiable. Exposure can feel counterintuitive. And dynamic range problems abound.
The good news? Once you understand a few basics, you already have the tools to capture incredible images after the sun goes down.
TL/DR: Quick Night Photography Exposure Guide
Night photography requires balancing ISO, aperture, and shutter speed in ways that differ from daytime shooting. Use manual mode, shoot in RAW, and rely on a tripod. Here are quick starting points to guide your exposure choices:
- ISO: 200–800 for cityscapes; 3200–6400 for night sky.
- Aperture: f/5.6–f/8 for sharpness; wide open for astrophotography.
- Shutter Speed: As long as needed on tripod; 15–20 seconds for stars.
- Always check histogram, consider bracketing, and refine with highlight/shadow adjustments in post.
Table of Contents
Why Is Night Photography Different?
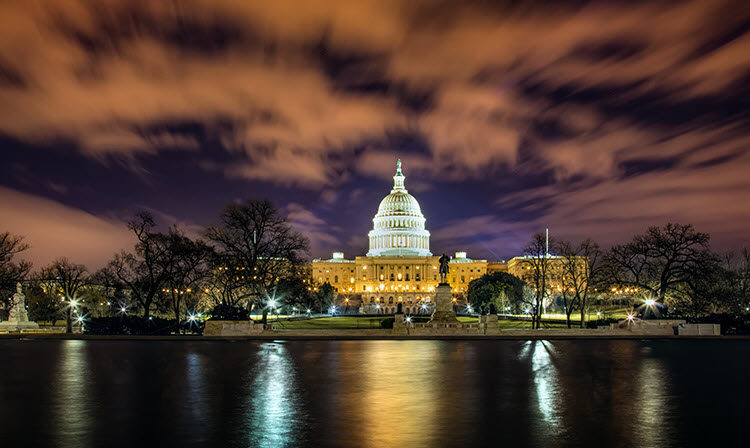
Night photography is different because your camera faces extremes — very bright highlights from artificial lights and deep shadows in the same frame. This high contrast often exceeds your camera’s dynamic range, making exposure tricky and requiring careful choices in ISO, aperture, and shutter speed.
During the day, your camera usually has enough light to work with. At night, light sources are small, scattered, and often surrounded by darkness.
That combination confuses your meter. It also exaggerates issues like noise, blur from long exposures, and color shifts under artificial lighting.
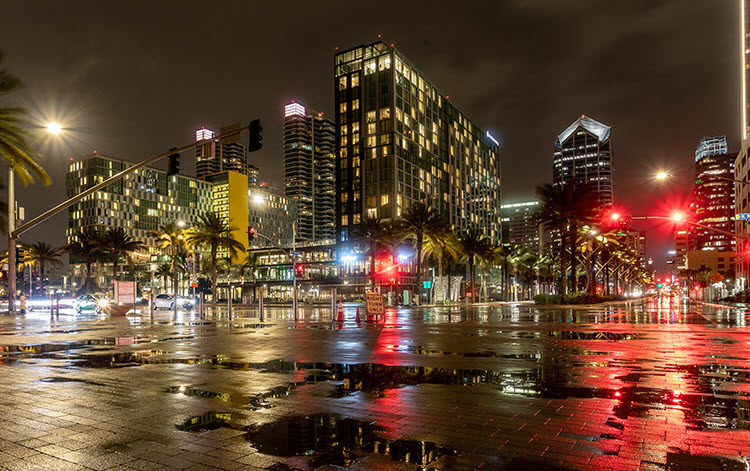
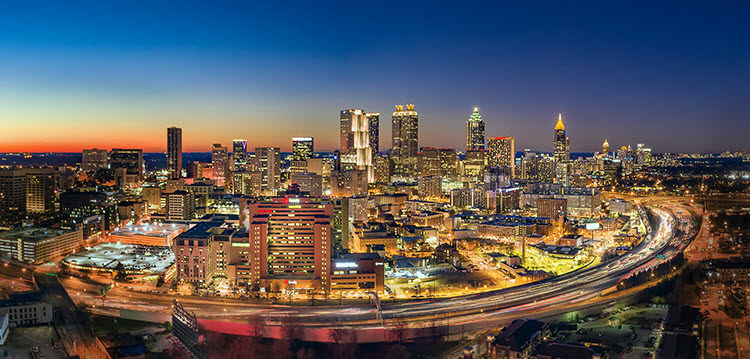
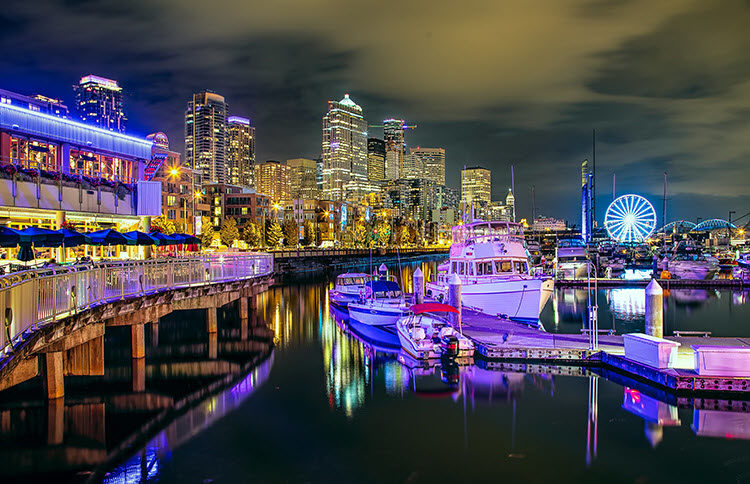
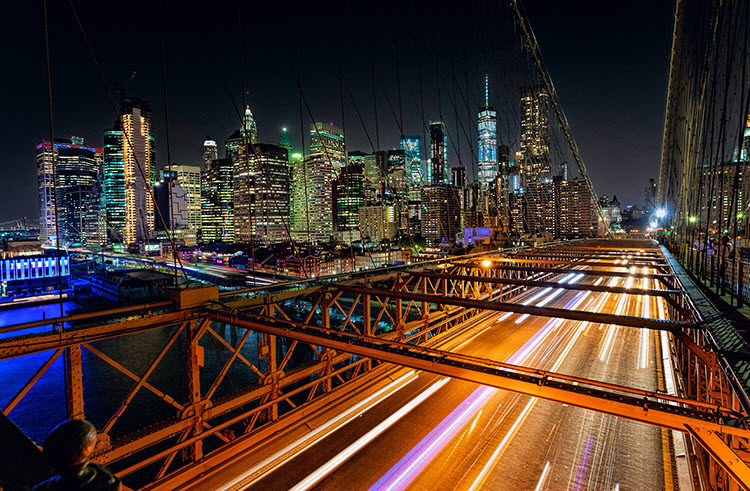
But the flip side is this: night gives you creative power you don’t get in daylight. Car trails, glowing skylines, reflections — these don’t exist at noon. At night, the city does the work for you.
Pre-Shoot Settings for Success
Before we dive into exposure settings, let’s make sure your camera is set up for success. Night photography benefits from a few specific starting adjustments that will give you more control and better image quality.
Should You Use Manual Mode at Night?
Yes. Manual mode gives you full control over ISO, aperture, and shutter speed, which is critical in low light. Automatic settings often fail at night, producing noisy or blurry results. Aperture priority can work, but full manual ensures consistent exposures.
When your camera sees mostly dark tones, it often tries to overcompensate. That’s why “auto” settings are unreliable.
By switching to Manual, you decide exactly how much light gets in and where your priorities lie — depth of field, noise levels, or sharpness.
If full manual feels intimidating, start with Aperture Priority. But avoid full auto. Night scenes are too complex to leave to the camera.
Learn more about manual mode.
Should You Shoot in RAW for Night Photography?
Absolutely. RAW captures the widest dynamic range and preserves detail in both highlights and shadows, which is essential at night. It also gives you more flexibility to correct white balance and reduce digital noise during editing.
Night scenes push your camera’s limits. Bright lights next to dark skies mean you’ll often recover detail later in post-processing. JPEG just won’t give you the same latitude.
Think of RAW as your insurance policy.
It records everything the sensor sees. Later, if you need to pull detail from the shadows or tame a blown-out highlight, RAW has the data to do it.
Read More: Raw vs JPG
How Do You Meter for Night Photography?
At night, your camera’s meter struggles with extreme contrast: bright highlights surrounded by deep shadows. The best approach is to start with evaluative/matrix metering, then refine manually or with spot metering on highlights to avoid blown-out lights.
Most cameras default to an automatic metering mode that averages tones across the frame.
This works surprisingly well for cityscapes — just center the meter and check the results.
But night scenes are tricky. A few bright lights surrounded by darkness can throw the reading off. That’s why I recommend experimenting.
If you want more control, switch to Spot Metering. Place the spot on a highlight and set it at +2 stops. This keeps bright lights within the camera’s dynamic range while pulling the shadows up enough to hold detail.
Will some shadows go to black? Of course — it’s nighttime! And that’s perfectly fine.
Best ISO, Aperture & Shutter Speed for Night Photography
Once you’ve metered the scene, the real work begins: choosing ISO, aperture, and shutter speed. These three controls — the exposure triangle — determine how much light reaches your sensor, how much noise you see, and how sharp your photo will be.
What ISO Works Best for Night Photography?
For city and urban night photography, ISO between 200 and 800 usually balances brightness and noise. For handheld or drone shots, you may need higher ISO, but keep it as low as possible to reduce digital noise.
ISO is your camera’s sensitivity to light. The higher you set it, the brighter your photo — but the more noise you’ll introduce.
At night, the temptation is to crank ISO sky-high. Resist it. Instead, lean on longer shutter speeds and a tripod.
Between 200 and 800 is the sweet spot for most urban night scenes.
Only go higher if you absolutely can’t use a tripod or if you’re shooting handheld from a drone.
What Aperture Should You Use for Night Photography?
For most night cityscapes, use an aperture between f/5.6 and f/8. This range balances sharpness and depth of field while allowing enough light into the camera. For creative effects or astrophotography, open up to f/2.8 or wider.
Unlike daytime landscapes, you don’t always need extreme depth of field at night. Much of the background is already black.
That means you can use larger apertures without sacrificing image quality.
f/5.6–f/8 is usually ideal: sharp across the frame, light-friendly, and often the lens’s “sweet spot.”
If you want silky starbursts from lights, stop down to f/11–f/16. But remember, smaller apertures mean longer shutter speeds.
What Shutter Speed Is Best for Night Photography?
With a tripod, your shutter speed can be as long as needed to achieve proper exposure. For cityscapes, that may mean several seconds. For stars, keep shutter speed under 20 seconds to avoid trails.
Shutter speed controls how long the sensor gathers light.
At night, it often means long exposures. That’s why a using a tripod is essential.
Set ISO and aperture first. Then let your shutter speed float to match the meter reading. For urban night photos, 2–30 seconds is typical.
For astrophotography, use the 15–20 second rule to keep stars sharp. Longer than that, and they’ll streak into trails.
What Are the Best Night Sky Photography Settings?
For astrophotography, start with a wide-open aperture (f/2.8 or faster), ISO 3200–6400, and shutter speed between 15–20 seconds. These settings balance brightness with minimal star trails while keeping noise manageable. A wide-angle lens works best.
These are the most common settings for when you want to photograph the night sky.
Unlike cityscapes, the night sky has almost no artificial light. That means your camera relies entirely on starlight, which is faint and fleeting.
A wide-open aperture gathers as much light as possible. High ISO boosts sensitivity. And shutter speeds longer than 20 seconds will show stars as streaks because the earth is rotating.
If your lens doesn’t open to f/2.8, use the widest it allows. You may need to nudge ISO up to compensate.
Using HDR in Night Photography: When It Helps (and When It Doesn’t)
Night photography often pushes your camera sensor to the edge. Bright streetlights, glowing neon signs, and deep shadows can create contrast levels a single exposure can’t handle. HDR (High Dynamic Range) helps by blending multiple bracketed exposures, preserving highlight and shadow detail that would otherwise be lost.
But HDR isn’t a magic fix.
Sometimes shadows add mood and mystery that you want to keep.
Let’s walk through why HDR matters in night photography, practical workflows in Lightroom, Luminar Neo, and Photoshop, and a few cases where HDR is better left unused.
Why HDR Matters in Night Photography
Urban night scenes almost always exceed your camera’s dynamic range. On one end, you have dazzling lights that blow out easily. On the other, inky black shadows that sink into pure darkness.
- Histograms tell the story: when the graph is slammed against both edges, your camera can’t capture it all in one shot.
- RAW vs JPG: RAW is critical here — JPG files simply don’t carry enough tonal information to merge effectively.
- ISO trade-offs: higher ISO might recover shadows, but it amplifies noise and hurts HDR blends. Bracketing exposures at low ISO preserves clean tonal data.
Want the full setup for bracketing? See Lesson 1 of the HDR Photography Course.
HDR Workflow Examples
There’s no single “best” HDR tool. Each approach has strengths for night photography:
Lightroom Classic (Photo > Merge > HDR)
- Auto-align stabilizes slight tripod shifts or handheld shots.
- Deghosting minimizes trails from passing cars or drifting clouds.
- Produces a 32-bit DNG — edit it like any RAW file, with huge tonal flexibility.
For the full Lightroom HDR workflow, see Lesson 2: Merging HDR in Lightroom.
Luminar Neo (HDR Merge + Panorama)
- More aggressive deghosting controls — useful for people, traffic, or moving leaves.
- Creative tools (Golden Hour, Foliage Enhancer) can add style — just keep it subtle to avoid the “overcooked” look.
- Can merge HDR with panorama stitching for sweeping night cityscapes.
Watch a full demo in Lesson 3: HDR Merge in Luminar Neo.
Photoshop (Manual Blending)
- Best when HDR auto-merges create halos or ghosting.
- Use layer masks to manually paint in highlight and shadow details from different exposures.
- Slower, but gives total creative control over tricky night scenes.
When Not to Use HDR at Night
HDR isn’t for every situation. In fact, sometimes it hurts more than it helps:
- Fast-moving subjects — people or traffic streak badly across merged frames.
- Low-contrast scenes — HDR flattens mood and kills atmosphere.
- Portraits at night — skin tones often look unnatural, and subject movement ruins merges.
As Darlene often emphasizes, restraint is key. If your middle exposure already holds detail in both highlights and shadows, HDR might actually reduce impact.
Read More: When to Use HDR and When Not
HDR Best Practices for Night Photography
- Keep results natural — avoid cranking saturation or clarity until halos appear.
- Always zoom in to 100% when checking deghosting — small artifacts can ruin detail.
- Bracket at 2 stops apart — fewer noisy overlaps, wider tonal coverage.
- For complex moving lights, try exposure blending in Photoshop instead of auto HDR.
Want to master HDR for night photography? The HDR Photography Course covers advanced bracketing, Lightroom and Luminar Neo merges, and Photoshop blending to tackle even the toughest night scenes.
How Should You Process Night Photography Shots?
The simplest and most effective adjustment for night photos is to lower highlights and raise shadows. This balances the exposure, prevents blown-out lights, and pulls detail out of dark areas. Add black point for contrast if needed.
Every editing program — from Lightroom and Luminar to mobile apps like Snapseed — has highlight and shadow sliders.
Step one: pull highlights down until the lights no longer dominate. This also enhances saturation.
Step two: raise shadows until the dark areas show detail.
Step three: lower blacks slightly if the photo looks washed out.
This one move often transforms a night photo from harsh and contrasty into balanced and striking.
From there, you can fine-tune color, clarity, and noise reduction as you would with any photo.
Common Mistakes in Night Photography
Night photography is rewarding, but it’s also easy to make mistakes that leave you with blurry, noisy, or flat images. Avoid these common errors to improve your results right away:
- Relying on Auto Mode: Cameras often misread dark scenes and overexpose. Manual mode is far more reliable.
- Cranking ISO Too High: Noise quickly ruins night photos. Use longer shutter speeds with a tripod instead.
- Forgetting the Tripod: Handheld night shots blur easily. A tripod is non-negotiable for sharp results.
- Removing All Shadows: Shadows add depth and mood. Don’t brighten everything — let darkness be part of the story.
- Skipping Bracketing: Bright lights and deep shadows challenge every sensor. Bracketing ensures you capture the full tonal range.
Night Photography FAQs
What ISO should I use for night photography?
For most city and urban night scenes, start with ISO 200–800 to balance brightness and noise. For astrophotography, higher ISOs like 3200–6400 are often needed to record starlight. Always aim for the lowest ISO your situation allows.
Tips to manage ISO at night:
- Stick with RAW format — it gives you more control over noise reduction later.
- If you must raise ISO, expose correctly in-camera rather than underexposing and brightening in post.
- Test your camera’s limits in advance — some handle ISO 3200 beautifully, others struggle.
What’s the best aperture for night shots?
For cityscapes and street photography, an aperture of f/5.6–f/8 usually works best, providing enough depth of field while still allowing light into the camera. For the night sky, use the widest aperture possible — ideally f/2.8 or faster.
Think of it this way:
- City scenes: f/5.6–f/8 = sharpness, balanced exposure, starbursts on lights.
- Astrophotography: f/2.8 or faster = gather starlight efficiently.
- Creative effects: smaller apertures (f/11–f/16) can create starburst effects, but they require longer shutter speeds.
How do I avoid blurry night photos?
Blurry night photos happen when your camera moves during long exposures. To avoid this, use a tripod, set a remote release or timer, and keep ISO low enough to allow manageable shutter speeds. Handheld shooting is possible, but expect more noise.
Other ways to fight blur:
- Turn on image stabilization if your lens or camera offers it.
- Shield your tripod from wind or vibrations (cars, people walking).
- For handheld: open your aperture fully and keep shutter speed above 1/60 sec, though results vary.
Should I use HDR for night photography?
HDR can help when a night scene has both bright highlights and deep shadows your camera can’t capture in one shot. Bracketing 3–5 exposures and merging them keeps detail across the tonal range. The key is to keep results natural, not exaggerated.
When HDR works best:
- Neon signs beside dark streets
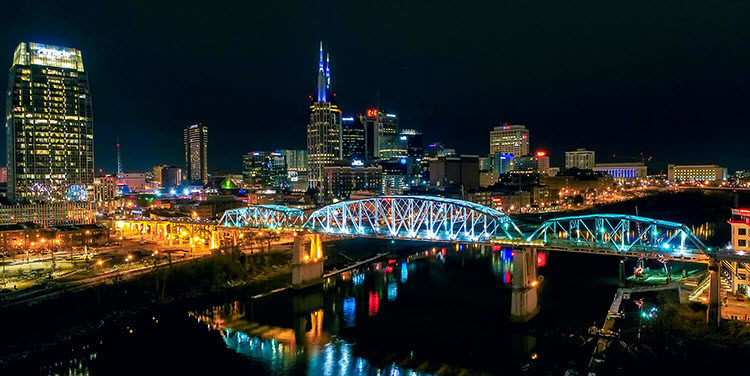
- Bridges lit at night with shadowy water underneath
- City skylines with glowing lights and deep sky
When HDR doesn’t help:
- Moving cars or people (ghosting)
- Low-contrast scenes where shadows add mood
What’s the easiest way to improve night photos in editing?
The simplest edit is lowering highlights and raising shadows. This balances exposure, reduces blown-out lights, and reveals hidden details in dark areas. Then adjust blacks to add contrast so the photo doesn’t look flat.
Quick editing checklist:
- Pull down Highlights for better saturation.
- Lift Shadows to recover detail.
- Adjust Blacks slightly down for depth.
- Apply noise reduction gently if ISO is high.
Even on a phone app like Snapseed, these small moves make a huge difference
Concluding Thoughts
You should now have everything you need to go out and capture some great night photos.
I have thrown a lot of concepts and numbers at you, so let me conclude with a few thoughts.
First of all, remember that this is digital photography and the light doesn’t really change at night. Therefore, you can take your time and you always get a “do over.” If you got it wrong, or just don’t like the way it looks, just adjust and take another shot. It costs you nothing.
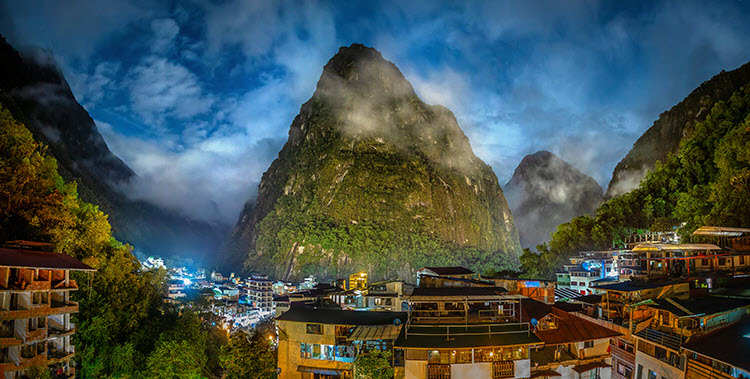
Finally, try your best, but don’t get too hung up on your exposure values. Sometimes you will look at your settings later and wonder what you were doing. For example, take a look at this shot:
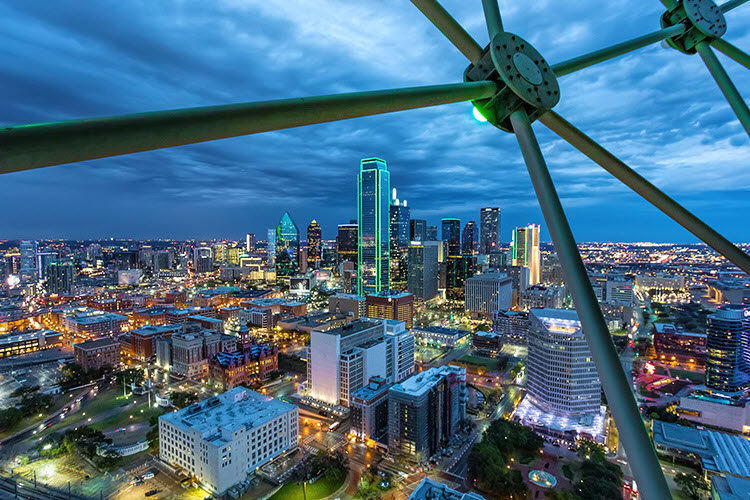
Everything about these exposure settings is wrong.
ISO 3200? What was I thinking there?
An aperture of f/8 when I have objects in the immediate foreground that I wanted to keep sharp as well? That makes no sense.
And why the fast shutter speed? I don’t know. But in the end, I like the shot.
And that’s what is important. Shoot what you love and enjoy it!